If you are trying to disable Chrome auto update, remember that you will not receive Google Chrome’s regular security patches and bug fixes (if any) which makes your browser vulnerable to internet threats and hacking.
It is not recommended to disable auto-update in Google Chrome. For whatsoever reason, if you are trying to turn off Chrome updates, go through the various ways below and apply the easiest one.
Let’s start with the various ways to disable chrome auto updates in Windows.
1. Edit Registry:
Caution: Before making any changes to the registry, make sure to take a backup if you are modifying the registry for the first time or not confident enough.
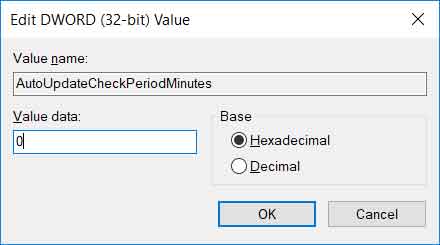
Go to HKEY_LOCAL_MACHINE\SOFTWARE\Policies\Google\Update folder.
Look for the registry key AutoUpdateCheckPeriodMinutes.
Right-click and Modify…
Change the “Value data” field to 0
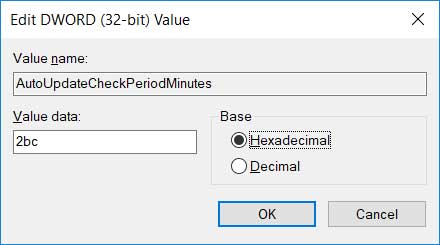
If you ever change your mind and turn on or enable Chrome auto-update, you need to go to the above registry path and revert the changes.
Select the Hexadecimal radio button and set the “Value data” to 2bc.
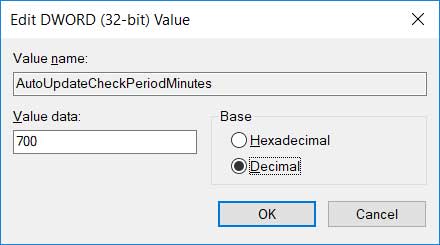
Or, select the Decimal button and set the “Value data” to 700.
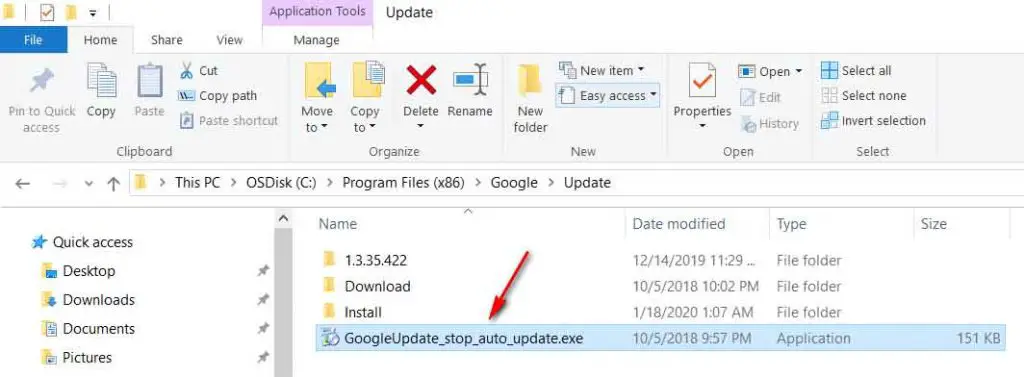
In the installed location of Google Chrome GoogleUpdate.exe is responsible to check for available updates regularly.
Note: You need Administrator rights to rename the exe.
Go to the below path depending upon the bit version of Chrome. C:\Program Files (x86)\Google\Update → 32-bit Chrome C:\Program Files\Google\Update → 64-bit Chrome
Rename the GoogleUpdate.exe to anything.
The executable will never be triggered, so is your Chrome auto-update. Now go to Customize and control Google Chrome → Help → About Google Chrome or type chrome://settings/help in the URL section.
Again, if you want to enable Chrome auto-update, rename the exe back to GoogleUpdate.exe.
3. Disable the Chrome update in Windows Services:
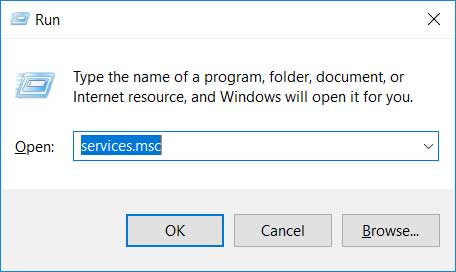
Open the “Run” command by pressing “Windows+R” or by typing “run” in the Windows search.
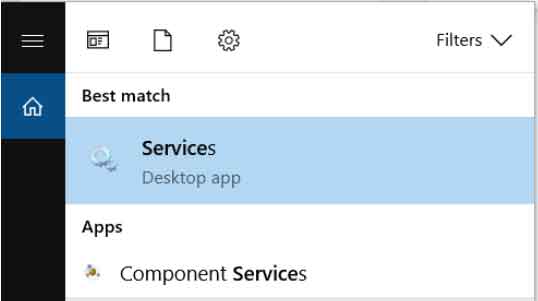
Type services.msc and click on OK. Else, directly type services in the Windows search
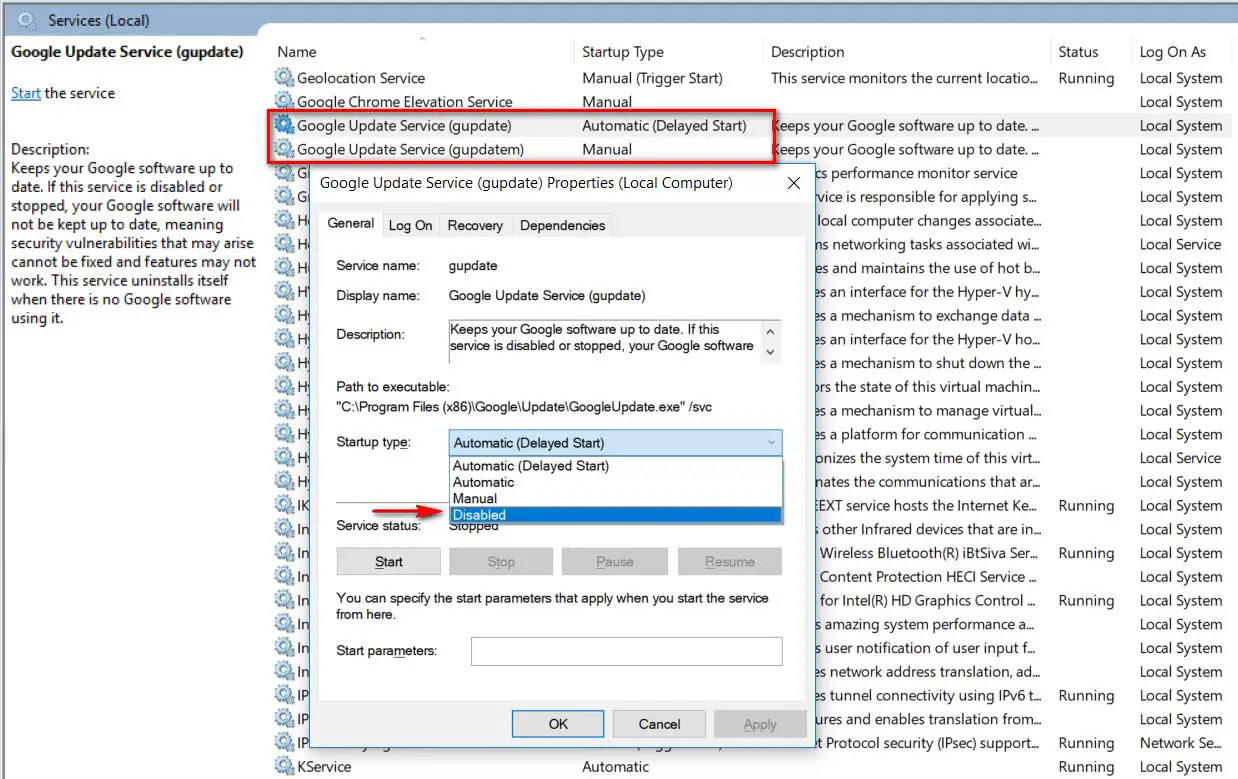
In the list of Windows services, look for services Google Update Service (gupdate) and Google Update Service (gupdatem)
Right-click on each of the services and go to Properties
Change the “Startup type” to Disabled
These are the working methods to disable Chrome auto update in Windows. Turning off Chrome updates is not recommended as you may miss some important security updates. If you are disabling the auto-update for any experimental purpose or development activities, do revert the changes once you are done.